This article will get you through the integration and implementation process for designing an intuitive audio player.
To achieve this, we chose the audio player plus recorder package from Dooboolab. This module establishes a link between the audio recorder and player. One note here: the playlist feature for the audio player is not supported by this module. This package only aims to provide simple recorder and player functionalities for both Android and iOS platforms. We are going to use the template from DesignIntoCode for the boilerplate.
You'll notice that the integration of the playlist feature is not supported by the react-native-audio-recorder-player package. But don't worry, we'll overcome this by adding features like play, pause, forward, revert, etc. We are also going to implement a seek bar and end with a rotating audio cover and title. These are the steps:
- Setting up Starter Template
- Setting up React Native Audio Player package
- Media Location
3.1. Play & Pause
3.2. Forward & Backward
3.3. Implementing Seek Bar
3.4. Rotate Title and Cover
1. Setting up Starter Template
First and foremost, we need to clone and set up the starter template from DesignIntoCode. This template provides a cool audio player app, while also installing the audio recorder and player package from Dooboolab automatically. The overall template code is available only on the App.js file.
The list of components that we are going to use in this project are shown in the code snippet below:
import React, { useState } from 'react';
import {
  StyleSheet,
  Text,
  View,
  Image,
  SafeAreaView,
  TouchableOpacity,
} from 'react-native';
import Slider from 'react-native-slider';
import FontAwesome from 'react-native-vector-icons/FontAwesome';
import AudioRecorderPlayer from 'react-native-audio-recorder-player';
2. Setting up React Native Audio Player Package
We move on to configuring some state handlers for the audio player package. The state variables to handle all the states of an audio player are configured in the code snippet below. There is also an addition of an array of static playlist data as shown in the code snippet below:
  const [isAlreadyPlay, setisAlreadyPlay] = useState(false);
  const [duration, setDuration] = useState('00:00:00');
  const [timeElapsed, setTimeElapsed] = useState('00:00:00');
  const [percent, setPercent] = useState(0);
  const [current_track, setCurrentTrack] = useState(0);
  const [inprogress, setInprogress] = useState(false);
  const [audioRecorderPlayer] = useState(new AudioRecorderPlayer());
These are the states explained:
isAlreadyPlay— use to toggle pay and pause state;duration— for track length;timeElapsed— for track elapsed time;percent— for track elapsed progress based on percent use in seek bar;current_track— to keep the index for the current track that has already been played;inprogress— to track the pause operation during progress;playlist— represents an array of mock static playlist data;AudioRecorderPlayer– initialization ofAudioRecorderPlayerinstance.
3. Media location
Here, we are going to use the RNFetchBlob package for fetching the music file. The installations instruction are available in the docs.
First, we need to import the RNFetchBlog package as shown here:
import RNFetchBlob from 'rn-fetch-blob';
Next, we get the path to document folder using the following piece of code:
let dirs = RNFetchBlob.fs.dirs.DocumentDir;
Then, we need to access the media file using the correct path:
const path = 'file://' + dirs + '/' + playlist[current_track].path;
We also need to initialize an array of objects containing music information for the playlist structure:
const playlist = [
  {
    title: 'Emergence of Talents',
    path: 'track1.mp3',
    cover:
      'https://images.unsplash.com/photo-1515552726023-7125c8d07fb3?ixlib=rb-1.2.1&ixid=eyJhcHBfaWQiOjEyMDd9&auto=format&fit=crop&w=667&q=80',
  },
  {
    title: 'Shippuden',
    path: 'track2.mp3',
    cover:
      'https://images.unsplash.com/photo-1542359649-31e03cd4d909?ixlib=rb-1.2.1&ixid=eyJhcHBfaWQiOjEyMDd9&auto=format&fit=crop&w=667&q=80',
  },
  {
    title: 'Rising Dragon',
    path: 'track3.mp3',
    cover:
      'https://images.unsplash.com/photo-1512036666432-2181c1f26420?ixlib=rb-1.2.1&ixid=eyJhcHBfaWQiOjEyMDd9&auto=format&fit=crop&w=334&q=80',
  },
  {
    title: 'Risking it all',
    path: 'track4.mp3',
    cover:
      'https://images.unsplash.com/photo-1501761095094-94d36f57edbb?ixlib=rb-1.2.1&ixid=eyJhcHBfaWQiOjEyMDd9&auto=format&fit=crop&w=401&q=80',
  },
  {
    title: 'Gekiha',
    path: 'track5.mp3',
    cover:
      'https://images.unsplash.com/photo-1471400974796-1c823d00a96f?ixlib=rb-1.2.1&ixid=eyJhcHBfaWQiOjEyMDd9&auto=format&fit=crop&w=334&q=80',
  },
];
Lastly, we need to navigate to the file location and copy music files to the required folder as directed in the screenshot below:

3.1. Play & Pause
In order to implement basic play and pause player features, we use the isAlreadyPlay state to toggle the displayed button. For the button, we are going to create a new component. For that, we need to create a new file called PlayButton.js. Then, we need to use the code from the code snippet below in the file:
import React from 'react';
import { StyleSheet, TouchableOpacity } from 'react-native';
import FontAwesome from 'react-native-vector-icons/FontAwesome';

export default function PlayButton(props) {
  return (
    <TouchableOpacity
      style={styles.playButtonContainer}
      onPress={props.onPress}>
      <FontAwesome name={props.state} size={32} color="#3D425C" />
    </TouchableOpacity>
  );
}

const styles = StyleSheet.create({
  playButtonContainer: {
    backgroundColor: '#FFF',
    borderColor: 'rgba(93, 63, 106, 0.2)',
    borderWidth: 16,
    width: 128,
    height: 128,
    borderRadius: 64,
    alignItems: 'center',
    justifyContent: 'center',
    marginHorizontal: 32,
    shadowColor: '#5D3F6A',
    shadowRadius: 30,
    shadowOpacity: 0.5,
  },
});
Then, we need to import the PlayButton component in App.js file, as shown:
import PlayButton from './PlayButton';
The next step is replacing the old button code with new component:
{!isAlreadyPlay ? (
  <PlayButton function={() => onStartPress()} state="play" />
) : (
  <PlayButton function={() => onPausePress()} state="pause" />
)}
For handling the play and pause operation, the method is fairly simple. After the user taps the play button, we set isprogress state, calculate progress as percent, and assign it to the state. When the user taps on the stop button, we simply change the isAlreadyPlay to false and call pausePlayer method as exemplified here:
const onStartPress = async (e) => {
  setisAlreadyPlay(true);
  setInprogress(true);
  const path = "file://" + dirs + "/" + playlist[current_track].path;
  audioRecorderPlayer.startPlayer(path);
  audioRecorderPlayer.setVolume(1.0);

  audioRecorderPlayer.addPlayBackListener(async (e) => {
    if (e.current_position === e.duration) {
      audioRecorderPlayer.stopPlayer();
    }
    let percent = Math.round(
      (Math.floor(e.current_position) / Math.floor(e.duration)) * 100
    );
    setTimeElapsed(e.current_position);
    setPercent(percent);
    setDuration(e.duration);
  });
};

const onPausePress = async (e) => {
  setisAlreadyPlay(false);
  audioRecorderPlayer.pausePlayer();
};
That's how we get this result:
As we can see, we can now perform play and pause operation smoothly.
3.2. Forward & Backward
Now, we are going to implement the forward and backward feature for the audio player. The idea is to increment the counter.
In order to increase the array index, we use indexOf in order to get the current_index for current_track and increment the track counter and start a new track by executing stop operation first as directed in the code snippet below:
const onForward = async () => {
  let curr_track = playlist[current_track];
  let current_index = playlist.indexOf(curr_track) + 1;
  if (current_index === playlist.length) {
    setCurrentTrack(1);
  } else {
    setCurrentTrack((current_track) => current_track + 1);
  }
  onStopPress().then(async () => {
    await onStartPress();
  });
};
The backward operation is similar as well. However, when the tracker reaches the start position, we move the pointer to the end of the playlist. The code for the backward function onBackward is this:
const onBackward = async () => {
  let curr_track = playlist[current_track];

  let current_index = playlist.indexOf(curr_track);

  if (current_index === 0) {
    setCurrentTrack(5);
  } else {
    setCurrentTrack((current_track) => current_track - 1);
  }
  onStopPress().then(async () => {
    await onStartPress();
  });
};
Then, we need to assign the functions to respective buttons as directed in the code snippet below:
<TouchableOpacity onPress={() => onBackward()}>
  <FontAwesome name="backward" size={32} color="#93A8B3" />
</TouchableOpacity>
<TouchableOpacity onPress={() => onForward()}>
  <FontAwesome name="forward" size={32} color="#93A8B3" />
</TouchableOpacity>
Hence, we will get the result as displayed in the demo below:
As we can notice, now our forward and backward buttons work as expected.
3.3. Implementing Seek bar
For seek bar, we need to keep track of progress by percent. We have already calculated the progress before in order to use it in the slider component to display the seek bar progress. Hence, we track the seek bar position by using onValueChangeevent as directed in the code snippet below:
<Slider
  minimumValue={0}
  maximumValue={100}
  trackStyle={styles.track}
  thumbStyle={styles.thumb}
  value={percent}
  minimumTrackTintColor="#93A8B3"
  onValueChange={(seconds) => changeTime(seconds)}
/>
Next, we send the percent back with calculated seek time and assign data to timeElapsed in order to display a new time. Then, we need to use seekToPlayer method to adjust the new start time as shown in the code snippet below:
const changeTime = async (seconds) => {
  // 50 / duration
  let seektime = (seconds / 100) * duration;
  setTimeElapsed(seektime);
  audioRecorderPlayer.seekToPlayer(seektime);
};
In order to display the elapsed time and duration, we use inProgress state as its handler:
<View style={styles.inprogress}>
  <Text style={[styles.textLight, styles.timeStamp]}>
    {!inprogress
      ? timeElapsed
      : audioRecorderPlayer.mmssss(Math.floor(timeElapsed))}
  </Text>
  <Text style={[styles.textLight, styles.timeStamp]}>
    {!inprogress ? duration : audioRecorderPlayer.mmssss(Math.floor(duration))}
  </Text>
</View>
Hence, we will get the result as displayed in the demo below:

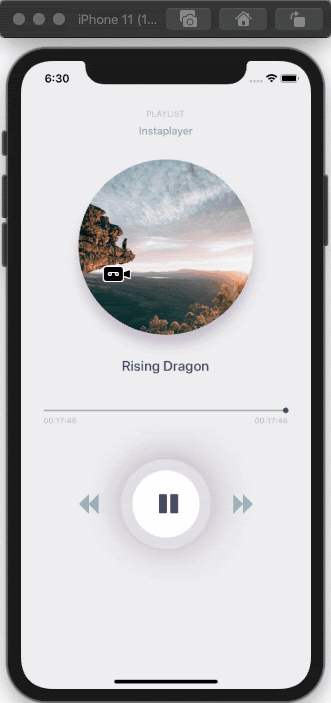
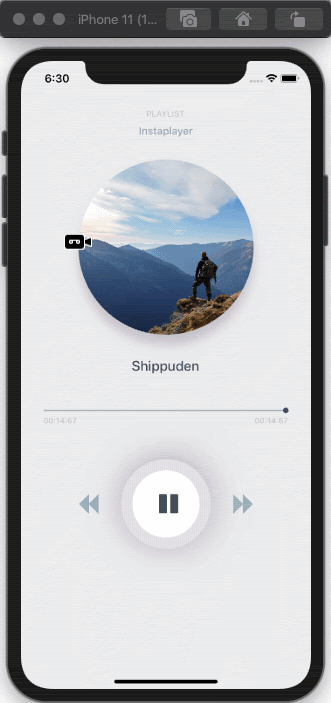
3.4. Rotate Title and Cover
Here, the idea is to change the audio title and cover image along with the track when we hit the next button. The code to implement this is provided in the code snippet below:
<View style={{ alignItems: "center" }}>
  <View style={styles.titleContainer}>
    <Text style={[styles.textLight, { fontSize: 12 }]}>PLAYLIST</Text>
    <Text style={styles.text}>Instaplayer</Text>
  </View>
  <View style={styles.coverContainer}>
    <Image
      source={{
        uri: playlist[current_track].cover,
      }}
      style={styles.cover}
    />
  </View>

  <View style={styles.trackname}>
    <Text style={[styles.textDark, { fontSize: 20, fontWeight: "500" }]}>
      {playlist[current_track].title}
    </Text>
  </View>
</View>
Here, we simply integrated the cover image and name of the track dynamically based on the playlist current track.
The result should be this:
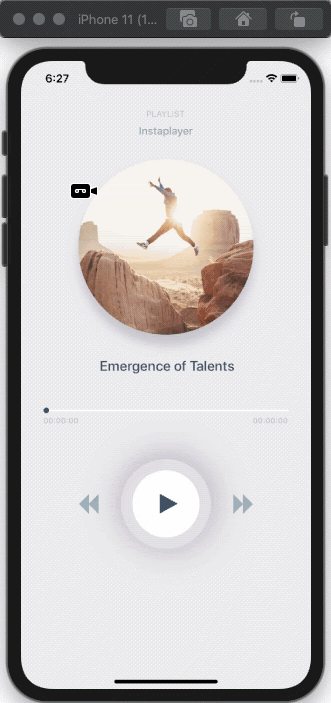
Now we can see that the cover image along with the track name changes when we change the audio track.
At this point we can say we have successfully completed the implementation of an audio player with playlist functionality along with all the features required in an audio player app using React Native and the required packages.
Conclusion
This is just a basic audio player design and feature implementation. You can take it up a notch by adding many other cool audio player features, according to your needs. All code is available on GitHub.
These being said, we hope this article helped you understand how to build a smashing, reliable music player with React Native. If you still have questions, we warmly welcome them in the comments section ☺️. Oh and if you learned something in this article, maybe you want to learn some more by subscribing to our newsletter (check below).